 注: 建议图片大小150px*50px
丨
注: 建议图片大小150px*50px Views: 0 Author: Site Editor Publish Time: 2026-07-13 Origin: Site


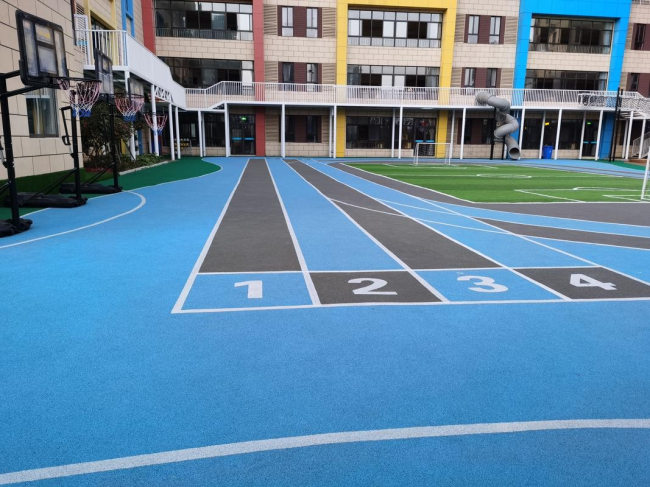
Wet pour EPDM surfacing is one of the most popular safety surfaces for playgrounds, parks, and recreational areas worldwide. This impact-absorbing, seamless rubber surface is installed on-site by mixing high-quality EPDM rubber granules with a polyurethane binder, then pouring and troweling the mixture onto a prepared base.
While the installation process may appear straightforward, achieving a durable, compliant, and visually appealing finish demands careful attention to every step. Industry experts agree that one mistake during installation can mean rework, complaints, or even injuries.
This step-by-step guide provides contractors and professional installers with the technical knowledge needed to deliver a high-quality wet pour EPDM installation.

What Is Wet Pour EPDM Surfacing?
Wet pour is a two-layer system that consists of a shock-absorbing base layer and a decorative, wear-resistant top layer.
The base layer uses SBR (recycled rubber) granules mixed with PU binder. This layer provides impact attenuation and critical fall height (CFH) protection. The thickness of this layer determines the critical fall height rating.
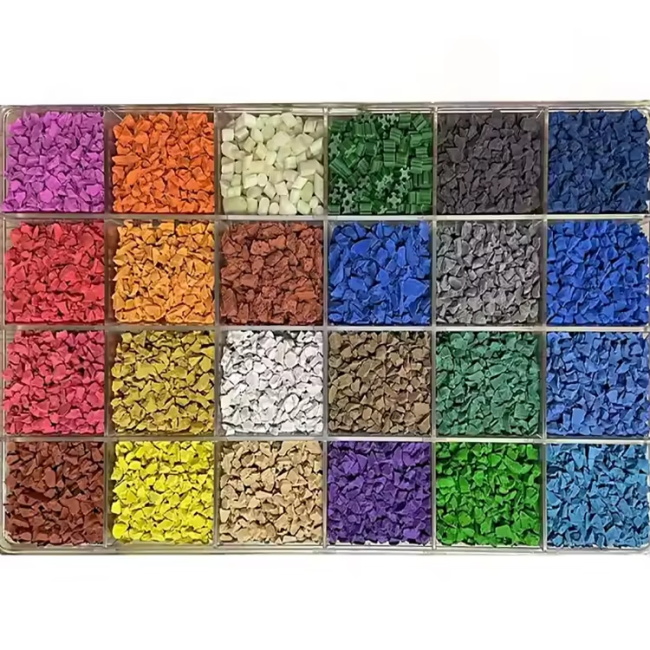
The top layer uses colored EPDM granules (typically 1–4mm) mixed with UV-stable PU binder. This layer delivers the visible surface, color, slip resistance, and weather resistance. The EPDM wearing course is typically 10–15mm thick.
Why Choose EPDM Over SBR?
EPDM granules offer superior UV resistance and color stability compared to SBR granules. While SBR (made from recycled tires) is cost-effective, it tends to fade when exposed to sunlight. EPDM maintains its vibrant colors for years, making it the preferred choice for outdoor playgrounds and public spaces.
Before You Start: Critical Considerations
Weather Conditions
Temperature and humidity directly affect cure times and installation success. The ideal installation temperature is between 10°C and 28°C. Do not install if rain is forecast within 24–48 hours. Avoid excessively humid days when possible, and never install on wet or saturated sub-bases.
Sub-Base Requirements
EPDM wet pour can be installed over concrete (primed for adhesion), asphalt/tarmac, compacted aggregate (MOT Type 1 stone), or existing hard surfaces (with proper edge detailing).
Proper preparation is essential. The base must be clean, dry, oil-free, and dust-free. Leveling should achieve a slope deviation of no more than 3mm. Proper drainage falls must be in place to prevent water pooling. The base must be 100% dry, with no rain within the previous 24–48 hours.
For new areas without a hard base, excavate and lay a minimum 150mm of compacted MOT Type 1 stone as a foundation.
Safety and Tools
Required tools include a forced action mixer or wheelbarrow and shovel, steel trowels of various sizes, a gauge rake or screed bar, measuring tools (scales or buckets), a roller for compaction, and safety gear including gloves, safety glasses, and a respirator.
Important: Use a lubricant such as Polysolv or mineral turpentine on tools to prevent the mixture from sticking during troweling.
Step-by-Step Installation Process
Step 1: Prepare the Sub-Base
A strong, clean base is the foundation of a durable EPDM surface.
First, clean thoroughly by removing all debris, dust, oil traces, and loose material using a high-pressure washer if needed.
Allow the surface to dry completely, waiting 24–48 hours after rain before proceeding.
If working on concrete surfaces, apply a base coat of aliphatic primer or binder to ensure proper adhesion. Apply primer a small section at a time (approximately 10ft²), as it must be used within 10 minutes before applying the EPDM mixture.
Install edge restraints using pre-cast kerbs, bricks, or plastic edging to create clean boundaries and prevent the wet pour from spreading. Timber is an option but may cause long-term maintenance issues.
Step 2: Install the SBR Base Layer (Shock Pad)
The SBR base layer provides the critical fall height protection required for playground safety certification.
Mix SBR granules with PU binder according to the manufacturer's ratio. The base thickness determines the critical fall height rating, so plan according to the play equipment height.
Pour and spread the SBR mixture evenly over the prepared sub-base. Trowel and compact to achieve a consistent thickness. Allow the layer to cure before applying the EPDM top layer.
Note: If using Clark Rubber installation guidelines, SBR granules are sold in 20kg bags with matching binder pails, with no measuring required.
Step 3: Mix the EPDM Top Layer
The EPDM wearing course is what gives the surface its vibrant color and UV-stable finish.
Empty one bag of EPDM granules into the mixing container or wheelbarrow. Add the complete contents of one binder pail, with the correct ratio controlled by pack weights.
Mix thoroughly for 2–3 minutes using a shovel or forced action mixer until all granules are evenly coated with binder. The recommended mixing ratio is 4:1 to 6:1 (EPDM granules to PU binder) by weight, depending on the application area.
Critical Work Time Warning: You have approximately 30 minutes from starting the mix to complete placement and troweling. Do not mix more material than can be installed within this window.
Step 4: Pour, Spread, and Trowel
Pour the EPDM mixture onto the SBR base layer or prepared sub-base (if installing without a base layer).
Spread evenly using a gauge rake or straight edge to achieve the required thickness, with a minimum of 10–15mm recommended.
Tamp down or roll to ensure proper density and eliminate air pockets.
Using a well-lubricated trowel, gently finish the surface to create a smooth, seamless appearance. Moisten the trowel constantly during smoothing, and never spread further than arm's length at a time.
Avoid over-compression, which can affect drainage and surface performance.
Pro Tip: When creating multi-colored patterns or graphics, use a lap joint by forming a small step at the edge of the first pour, approximately half the height of the finished surface.
Step 5: Finish Edges and Detail
Carefully finish edges around access covers, fencing, and perimeter restraints for a professional appearance.
Round edges for a neat look and to prevent chipping.
Where the surface meets existing hard bases, cut a channel in the existing formation to key the surface edge and prevent tripping hazards.
Step 6: Curing
Cure time is typically 24–48 hours, dependent on ambient temperature and humidity. Colder or more humid conditions require extended curing time.
Do not allow foot traffic or use until the surface is no longer tacky, which usually takes 24–72 hours.
Protect the area during curing from foot traffic, moisture, and debris.

Common Installation Mistakes to Avoid
Installing with rain forecast within 48 hours leads to poor adhesion, bubbling, and surface failure.
Mixing more than can be used in 30 minutes causes the mixture to cure before finishing, resulting in an uneven surface.
An inconsistent granule-to-binder ratio produces a weak surface with loose granules and excessive wear.
Using different batch granules in one zone creates color mismatch and visible seams.
Installing below 5°C or above 28°C causes extended curing and poor bond strength.
Insufficient sub-base preparation leads to cracking, lifting, and an uneven finish.
Lack of edge detailing creates tripping hazards and premature edge failure.

Why Choose Quality EPDM Granules?
The quality of your EPDM granules directly impacts the finished surface's durability and appearance. High-quality EPDM granules offer:
Superior UV resistance, ensuring colorfast and fade-resistant properties even after prolonged sun exposure
Excellent weather resistance to withstand rain, wind, and temperature extremes
Compliance with safety standards including BS EN 1177 (impact attenuation) and BS EN 14877 (sports surfacing) requirements when installed correctly
Long service life with resistance to wear and heavy foot traffic

Installing wet pour EPDM rubber granules requires careful attention to weather conditions, precise mixing ratios, and consistent technique. When installed correctly, EPDM wet pour surfacing provides a safe, durable, low-maintenance, and visually attractive solution for playgrounds, recreational areas, and sports facilities.
Key success factors:
Proper surface preparation is essential for adhesion and longevity.
Correct binder ratio, typically 4:1 to 6:1, ensures a strong, durable surface.
Work within the 30-minute time limit to avoid premature curing.
Maintain consistent thickness across the entire surface.
Allow adequate curing time, with a minimum of 24–48 hours.


Need a reliable source for premium EPDM granules?
WOW(LYG) New Material Co Ltd is a manufacturer specializing in the production of EPDM rubber granules. We use sulfur-free vulcanization technology, it increases the service life by more than 3 times than traditional EPDM granules, and enhances the performance, including anti-aging, high-temperature resistance, and colorfastness.
We have over 25 years of production experience and offer customization for colors and granule sizes. NO MOQ.


